Aktiv Learning

Canvas - Willo Labs - Configuration
(for Aktiv Team)
-
This requires that a Willo Labs Customer has already been created.
-
Logon to Willo Labs (Prod) or Willo Labs (Stage) for QA.
-
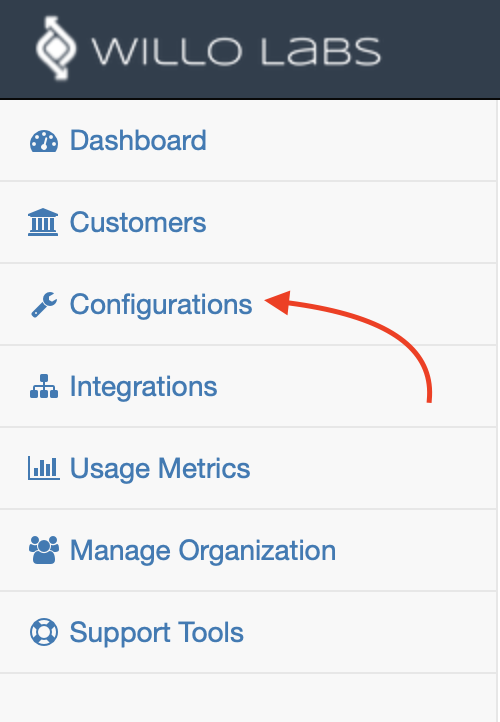
Select
Configurationson the left hand menu. -
Click the
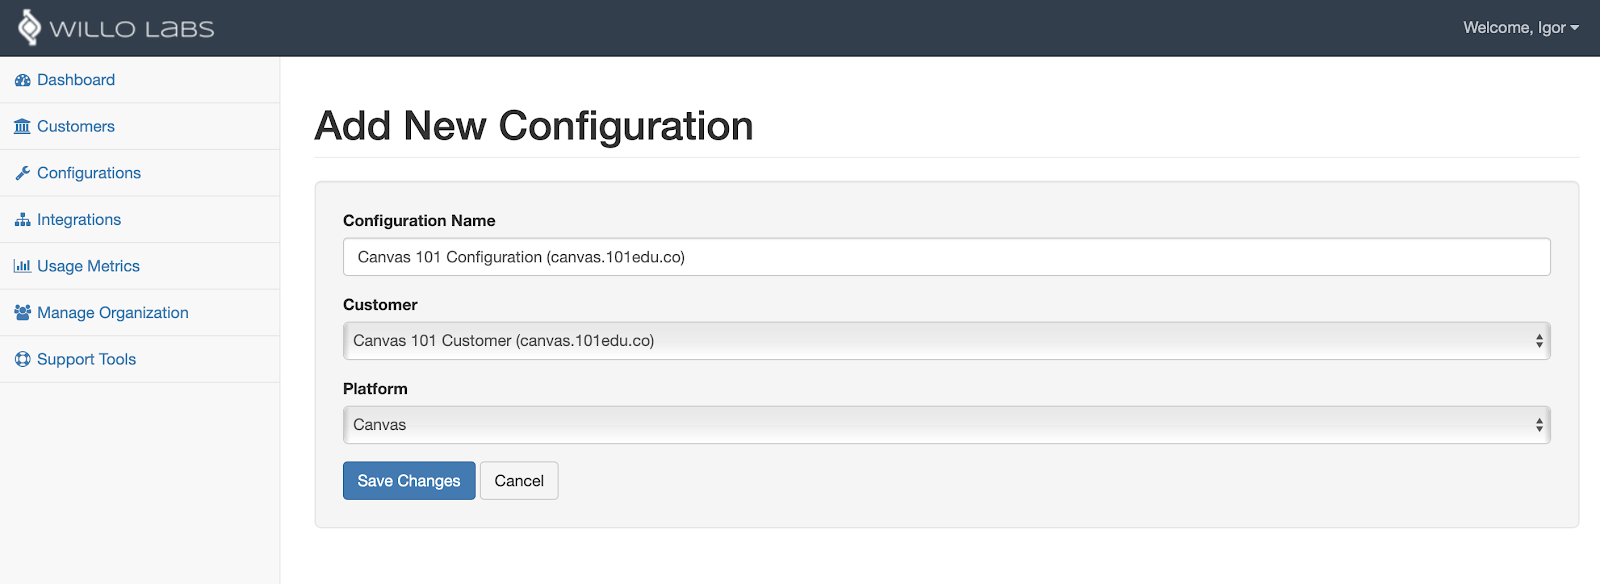
+ Add Configurationbutton on the right, and be sure to selectAdd Platform. - In the
Add New Configurationscreen,- Give it a name like
Canvas Institution Configuration (canvas.institution.com). Try to keep to the formatCanvas <INSTITUTION> Configuration (<LMS_URL>). - Select the willo labs customer we had previously created associated with this institution.
- Choose
Canvasas the platform. - Hit
Save Changes.
- Give it a name like
- You’ll get taken to the
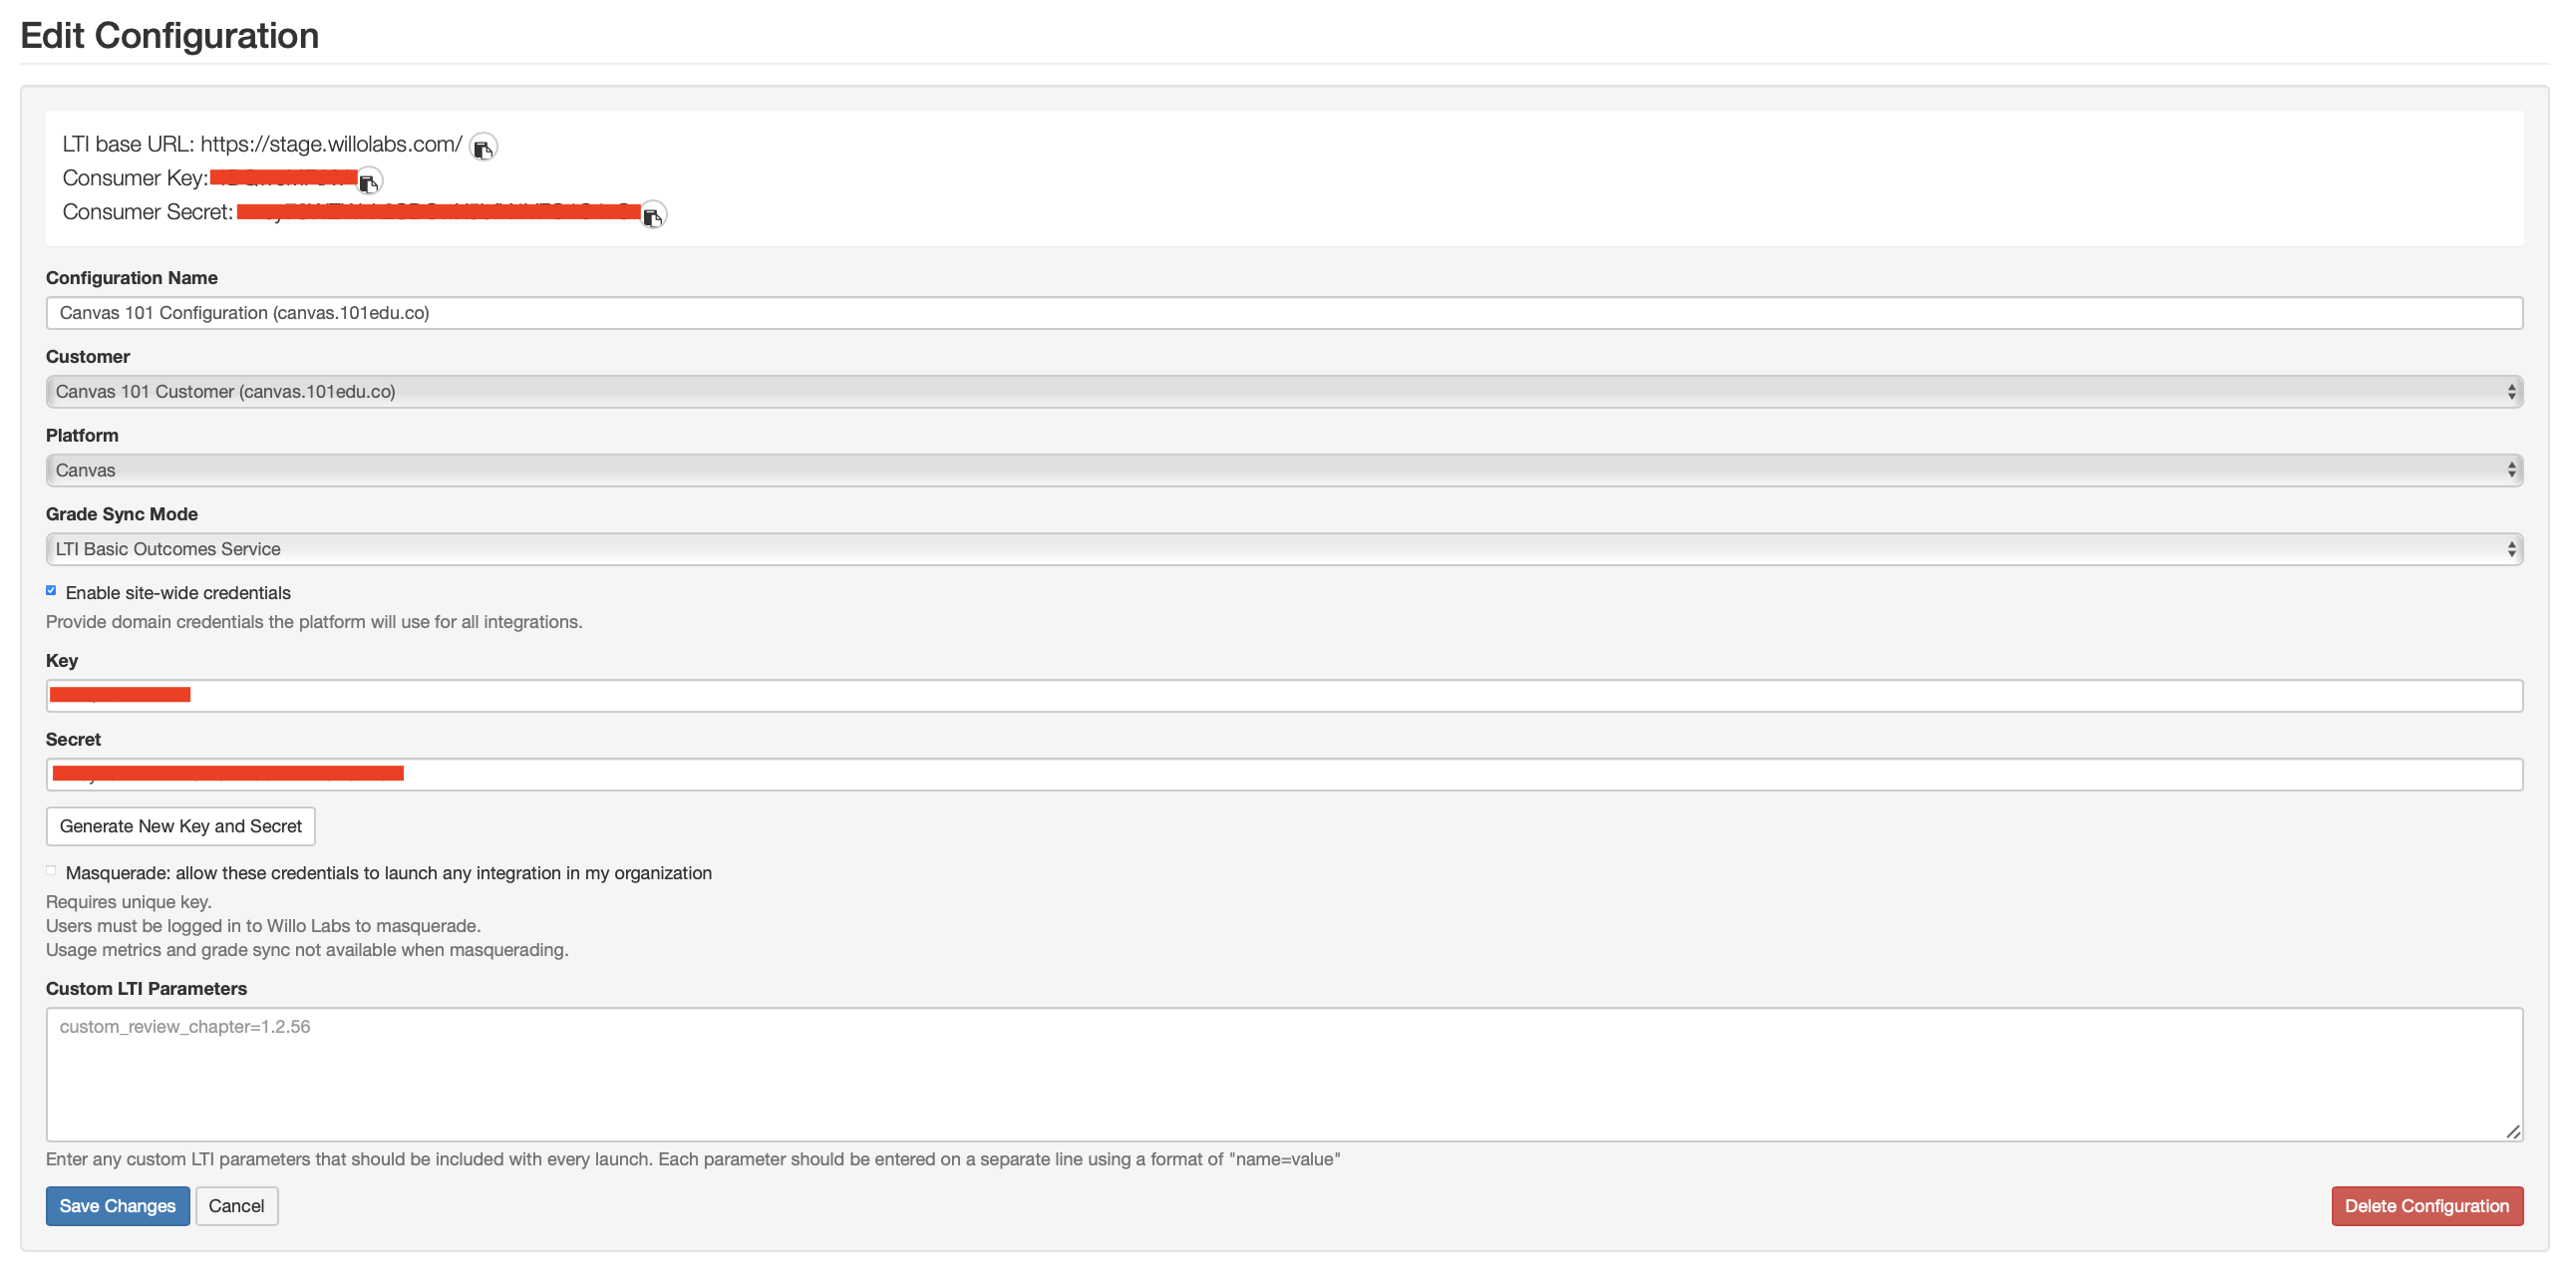
Edit ConfigurationPage.- You’ll notice the
LTI base URLbe set tohttps://app.willolabs.com/(orhttps://stage.willolabs.com/for QA). Take note of this. - You’ll also see a
Consumer KeyandConsumer Secretwhich you should take note as we’ll need these later. - Double check the
Configuration Nameand theCustomerfiels that are indeed set correctly. - The
Platformshould beCanvas. - For single column sync (v1), select
Grade Sync Modeto beLTI Basic Outcomes Service. - For multi column sync (v2), select
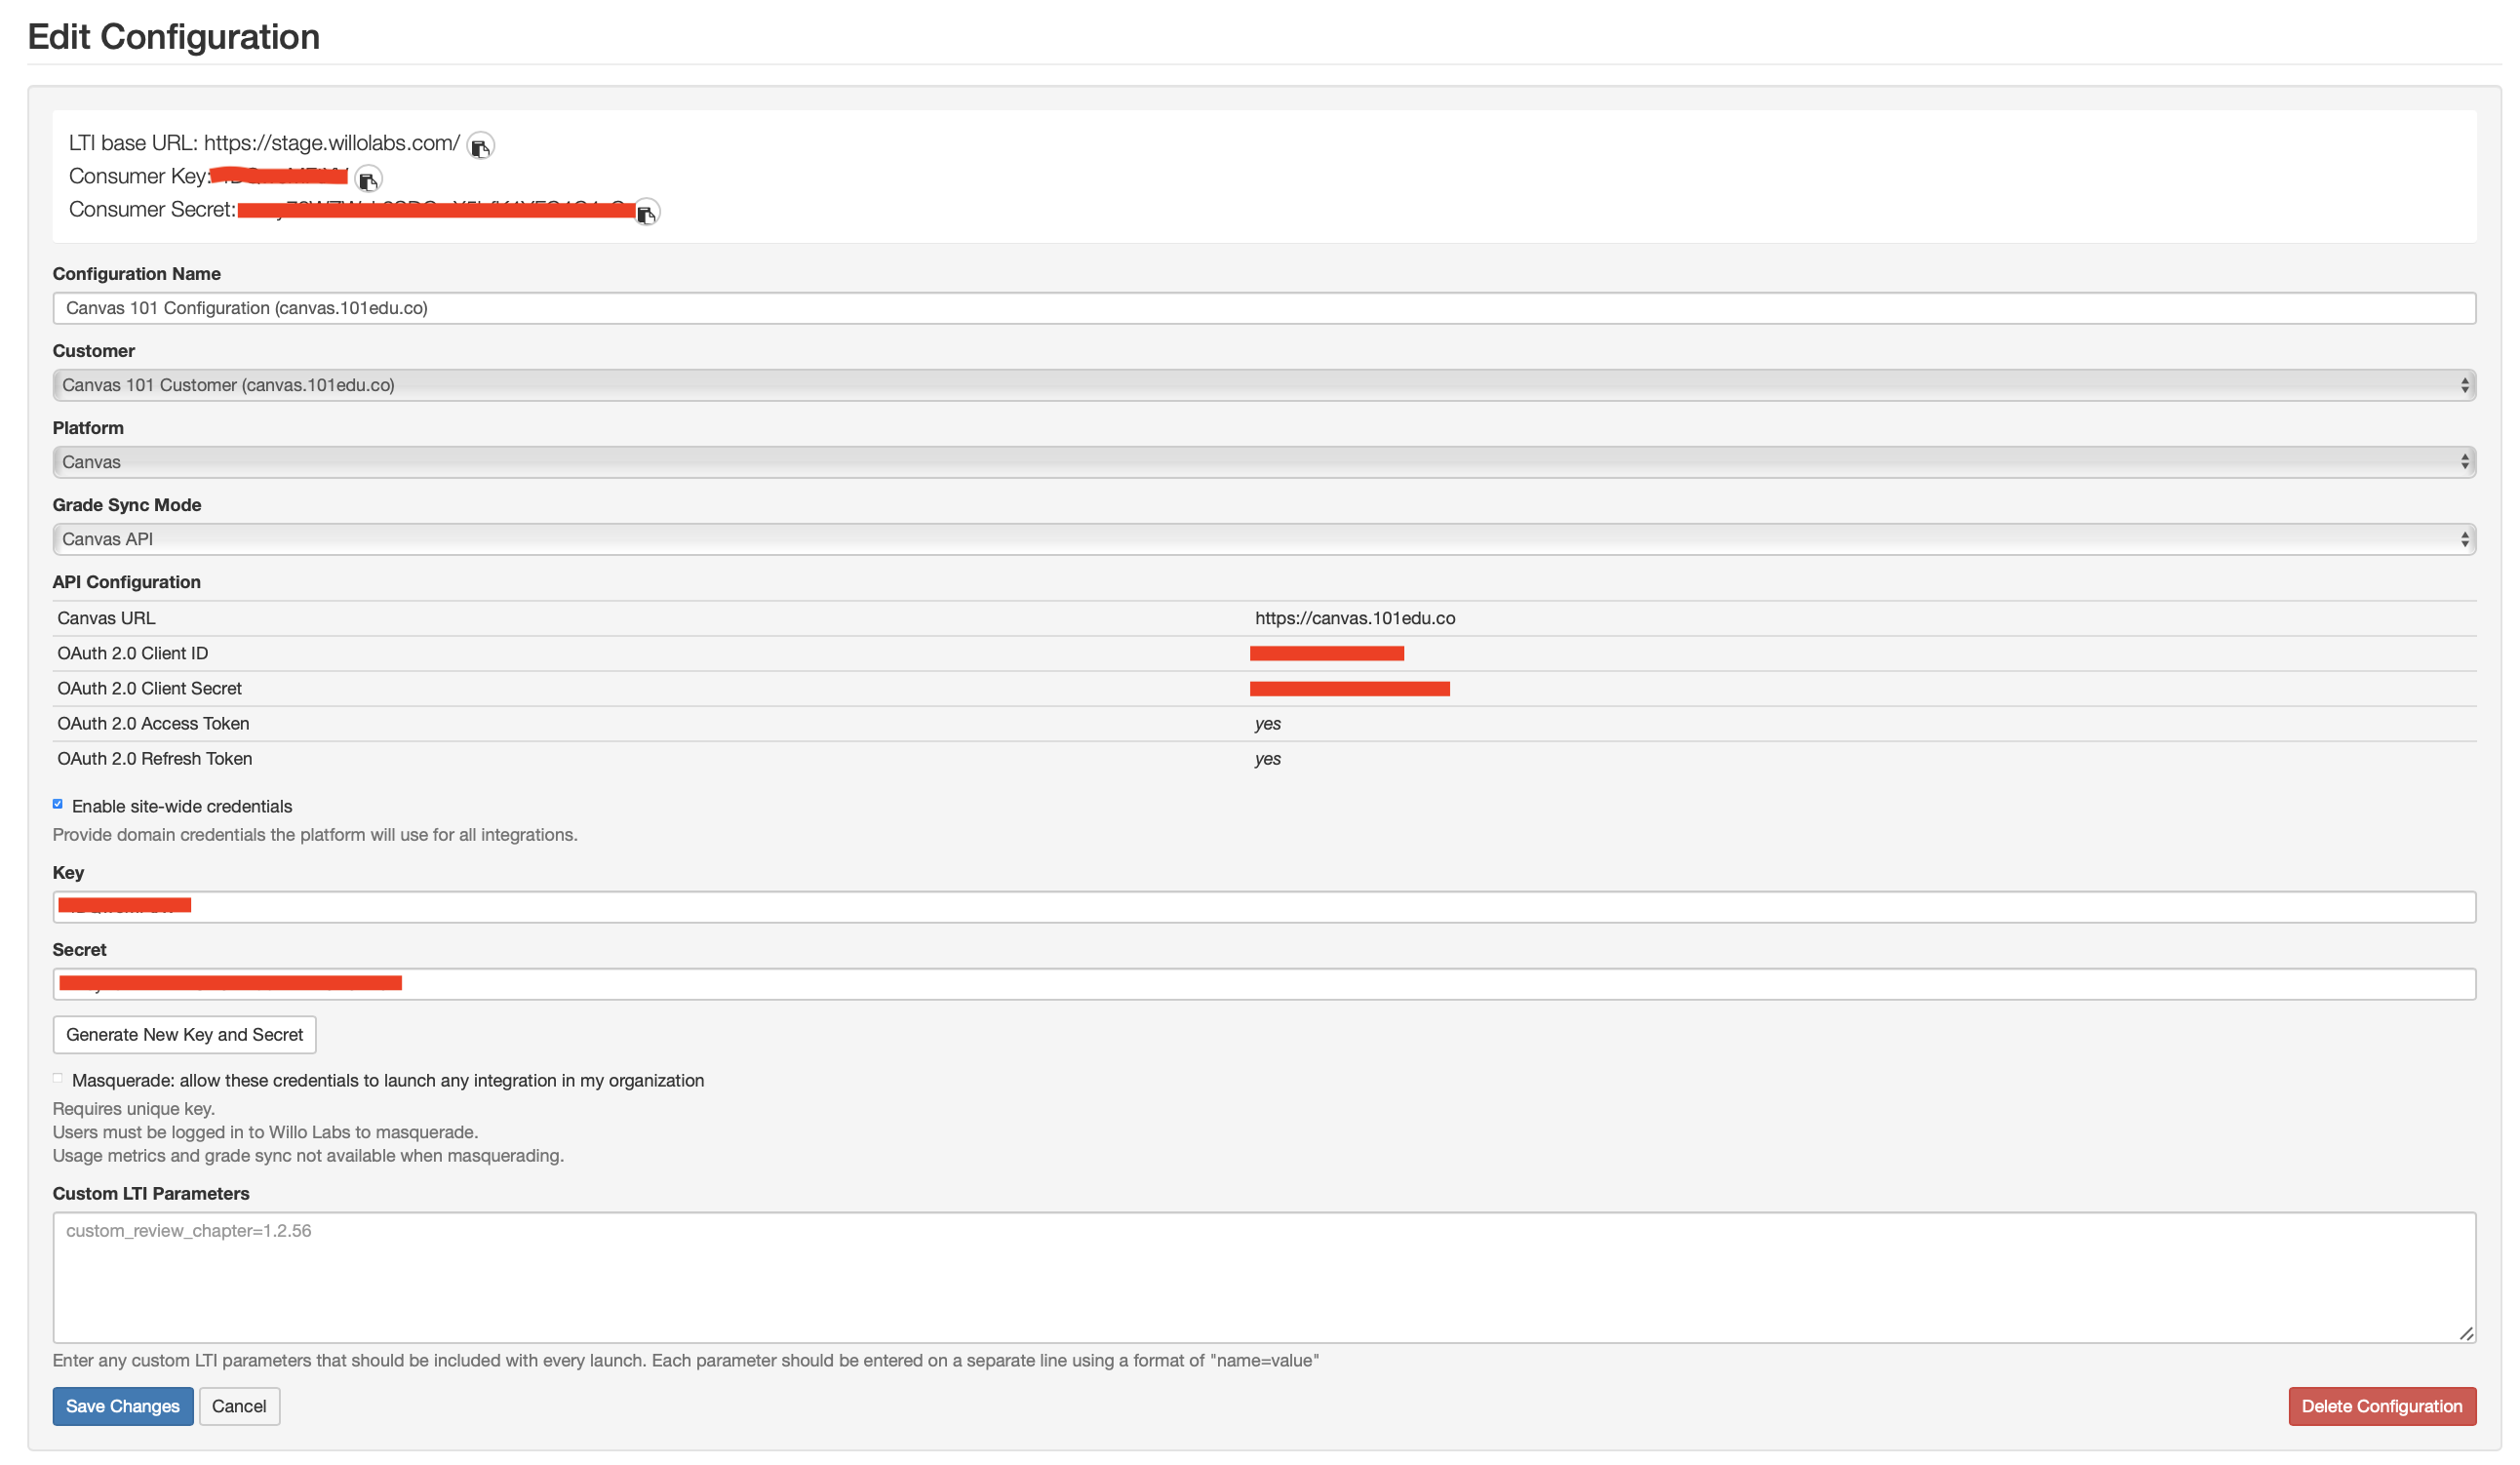
Grade Sync Modeto beCanvas API. - The
Enable site-wide credentialsshould be enabled. This should generate theKeyandSecretautomatically, or if not, hit thatGenerate New Key and Secret. - Leave the
Masquerade...disabled. - Leave the
Custom LTI Parametersempty. - Hit
Save Changes.
OR for Multi Column Configuration:
- You’ll notice the
- Next step is to add an Willo Labs Integration.


